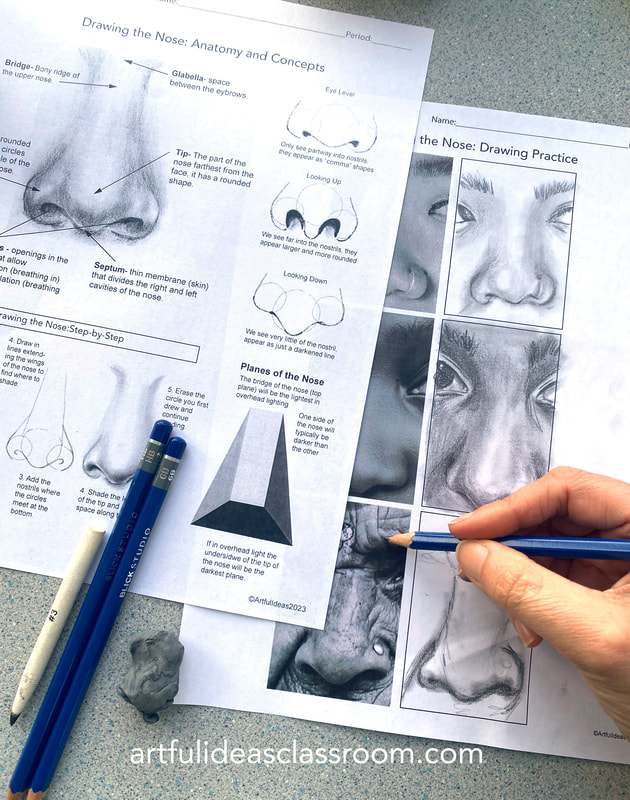
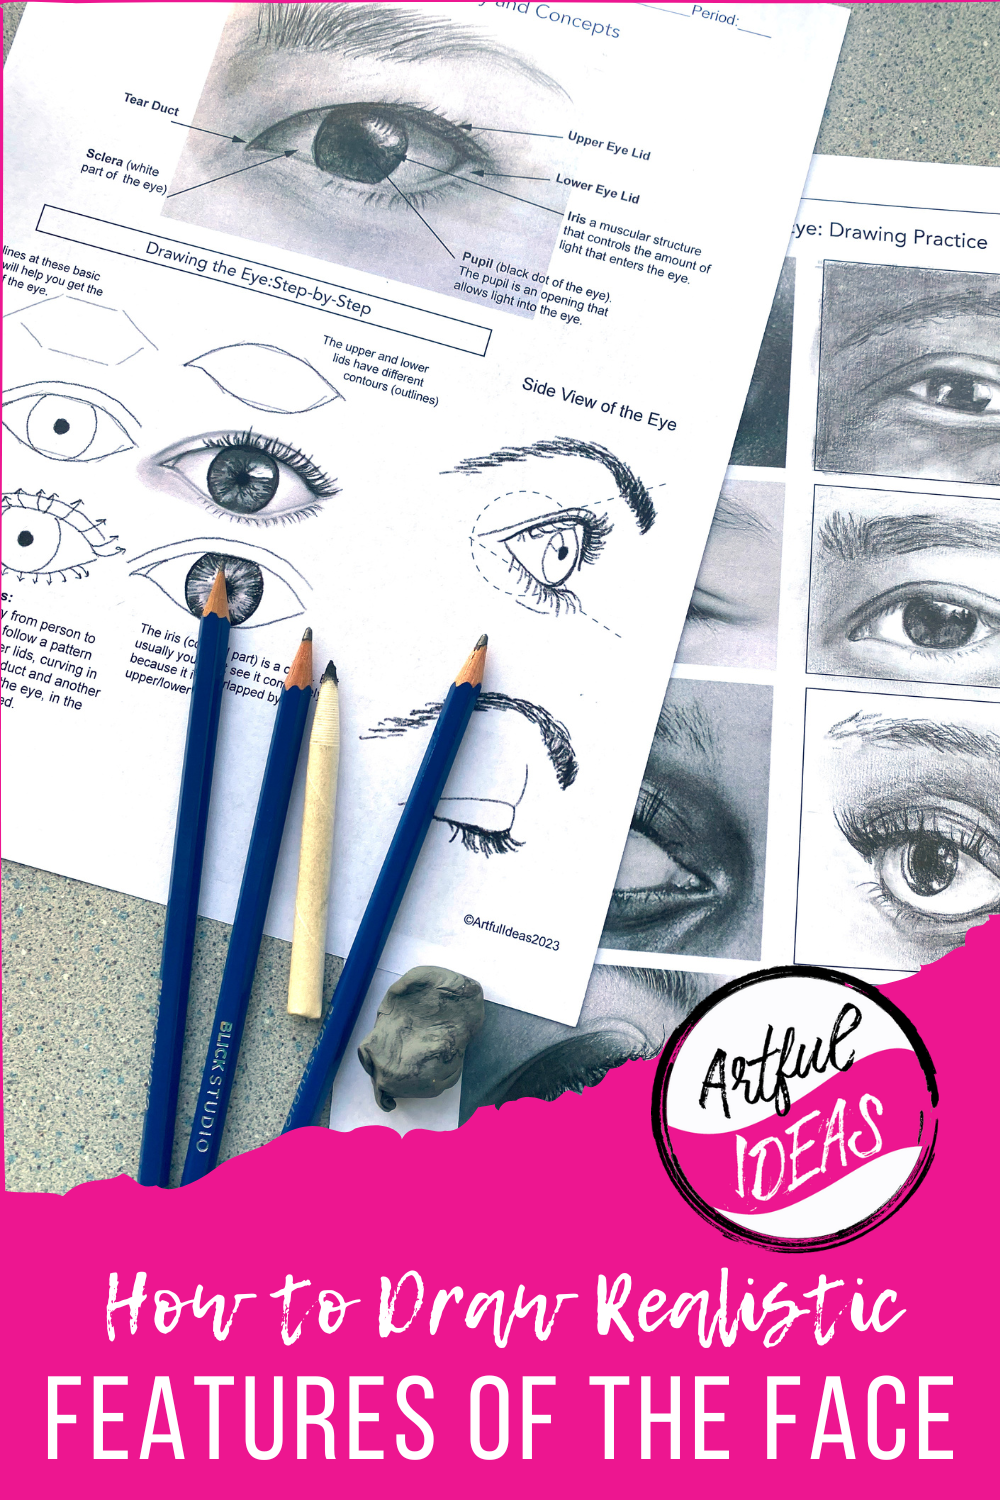
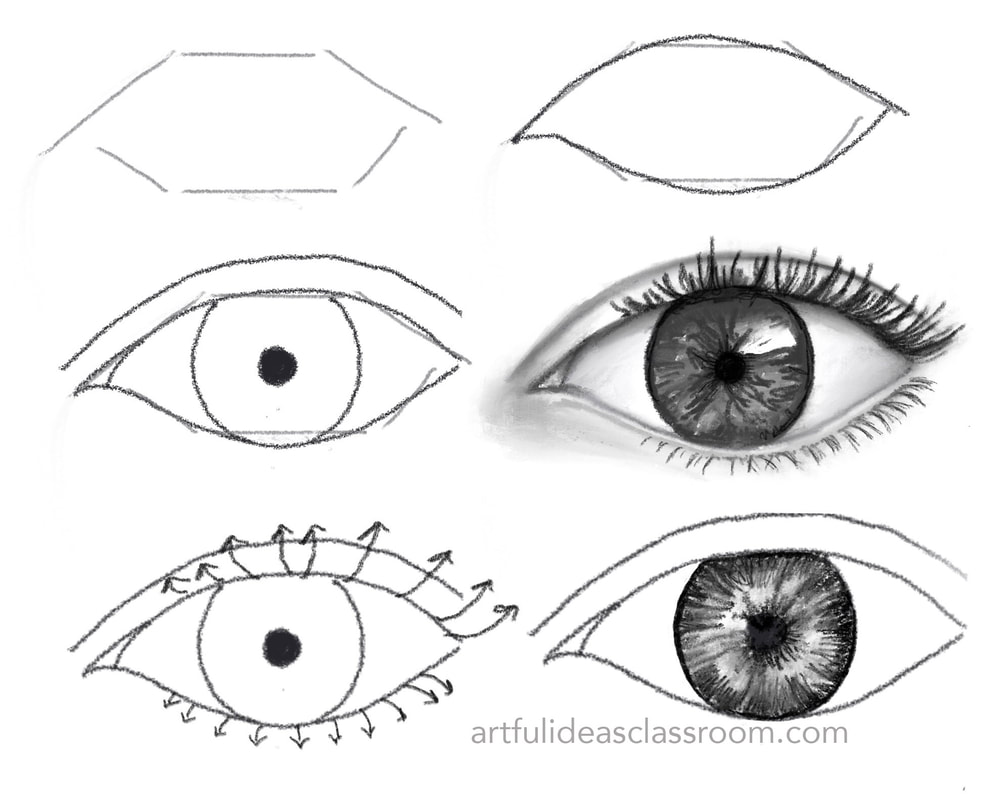
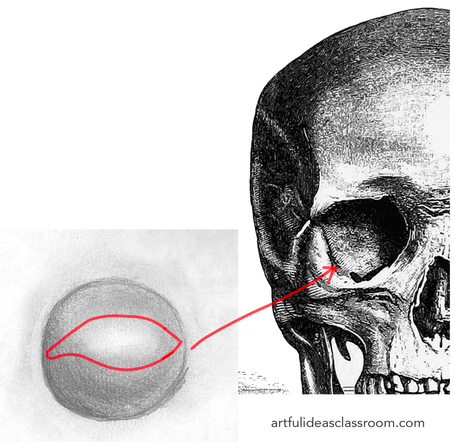
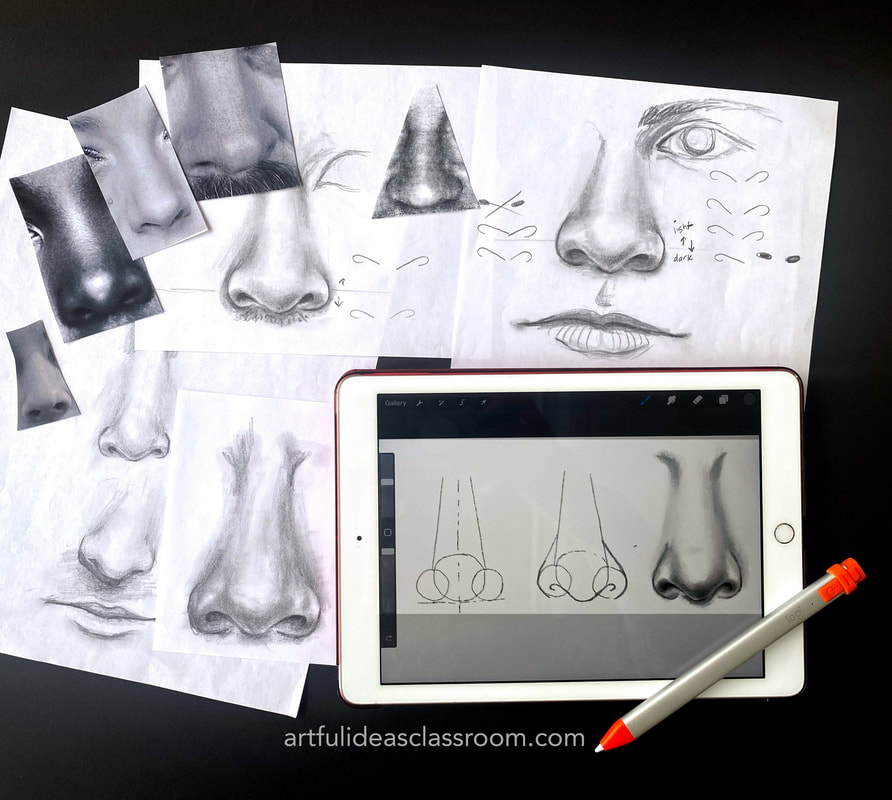
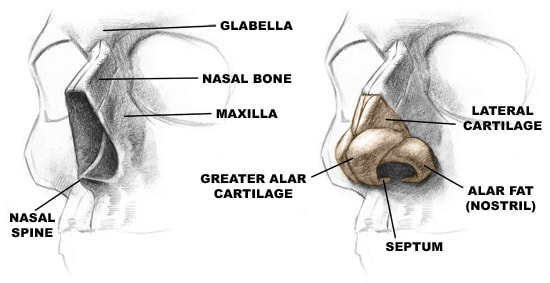
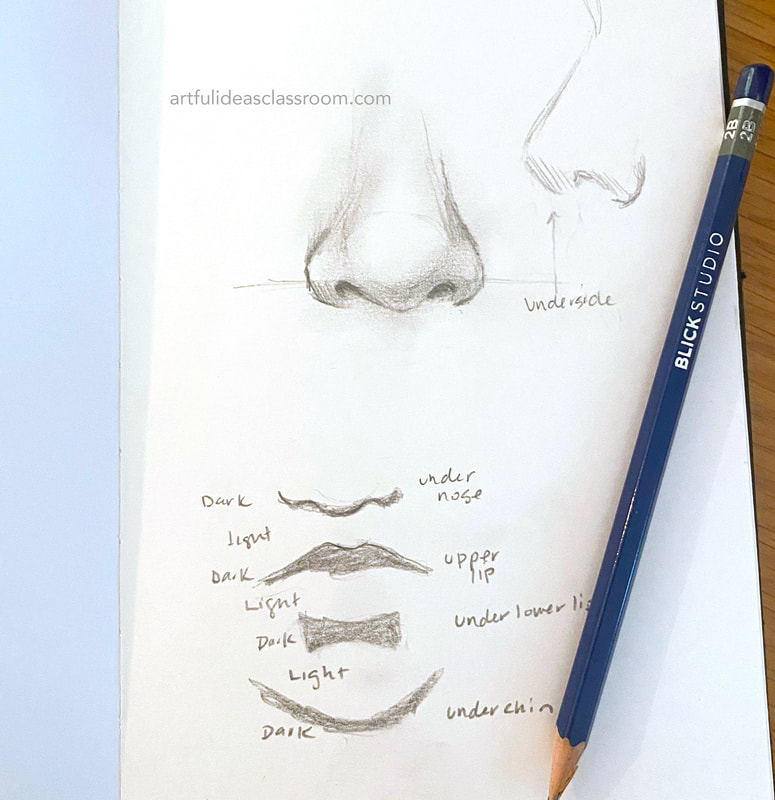
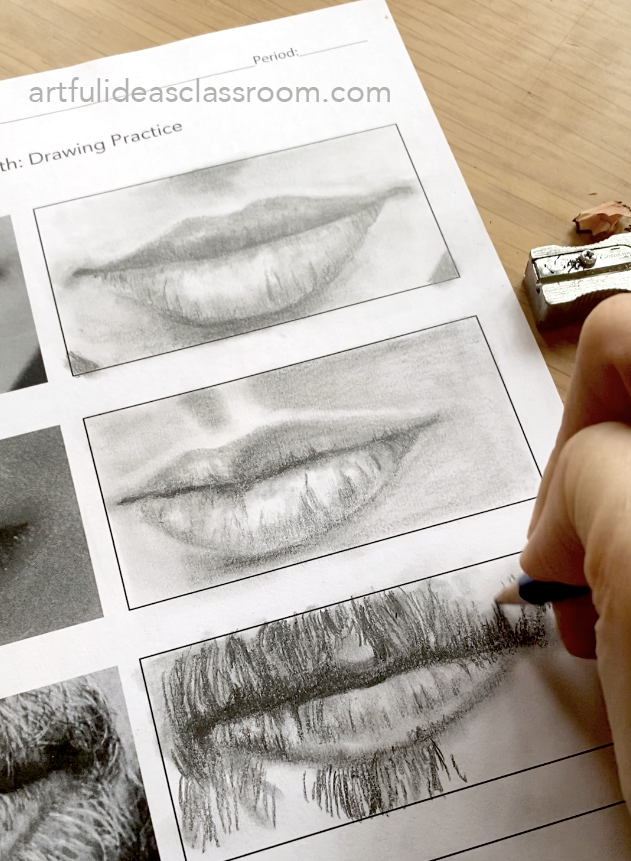
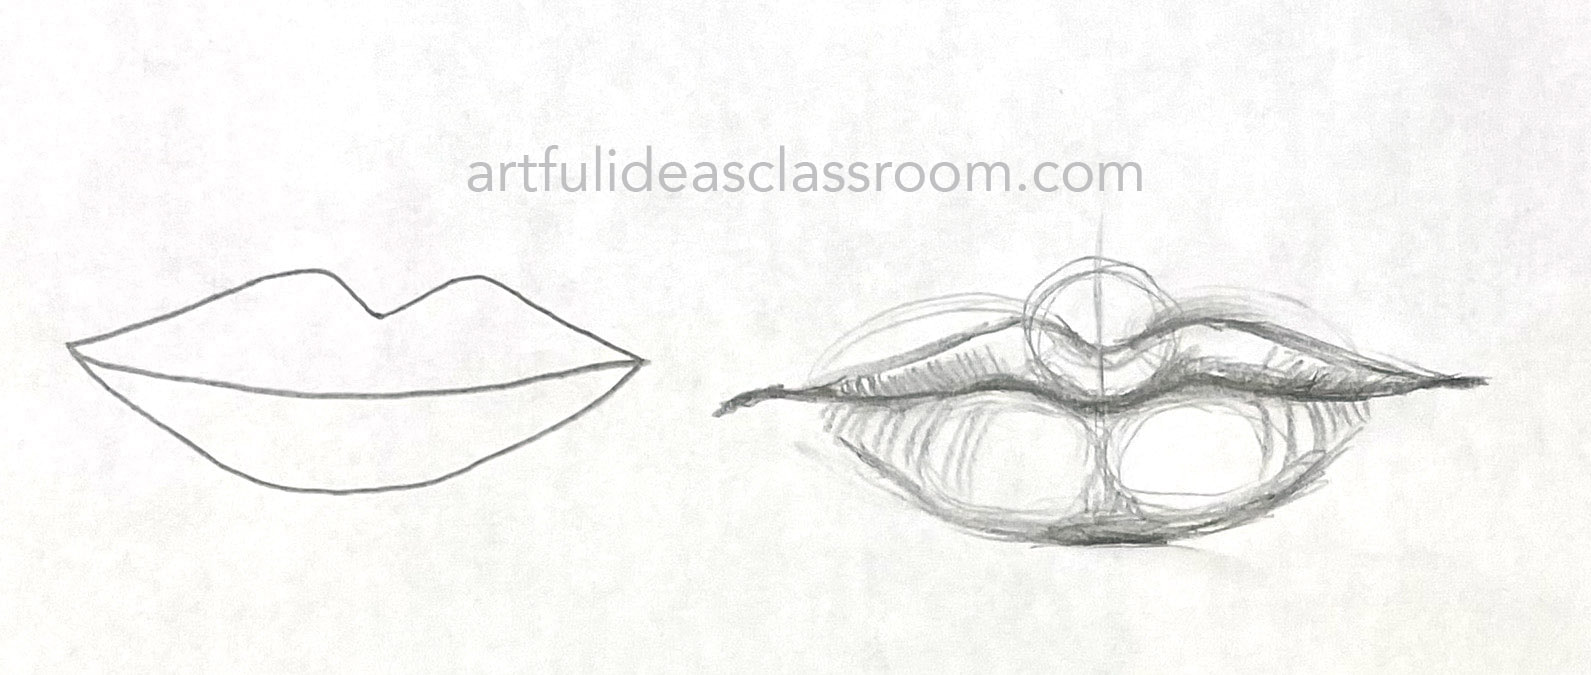
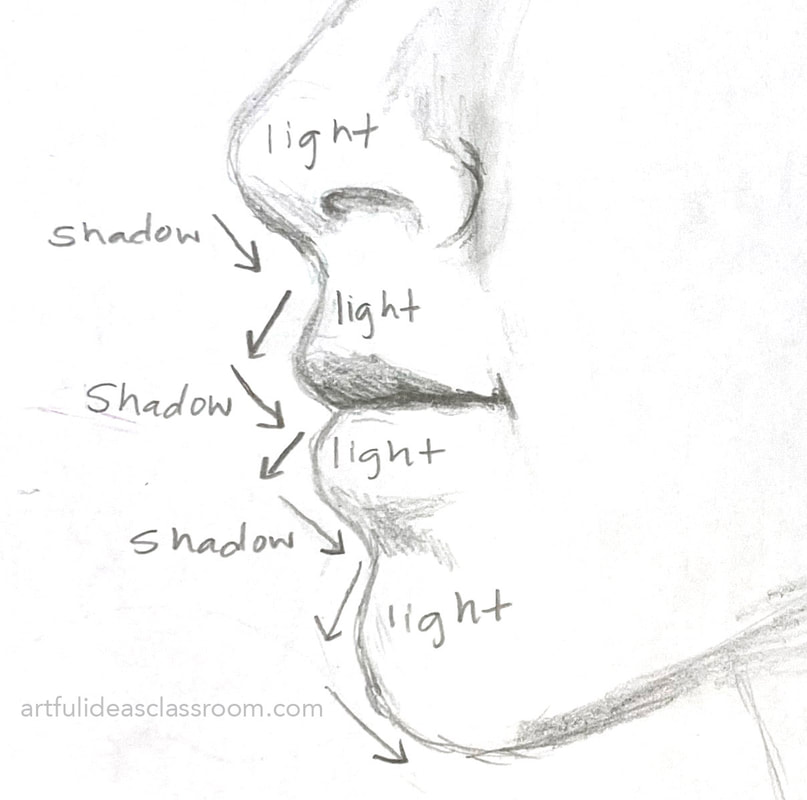
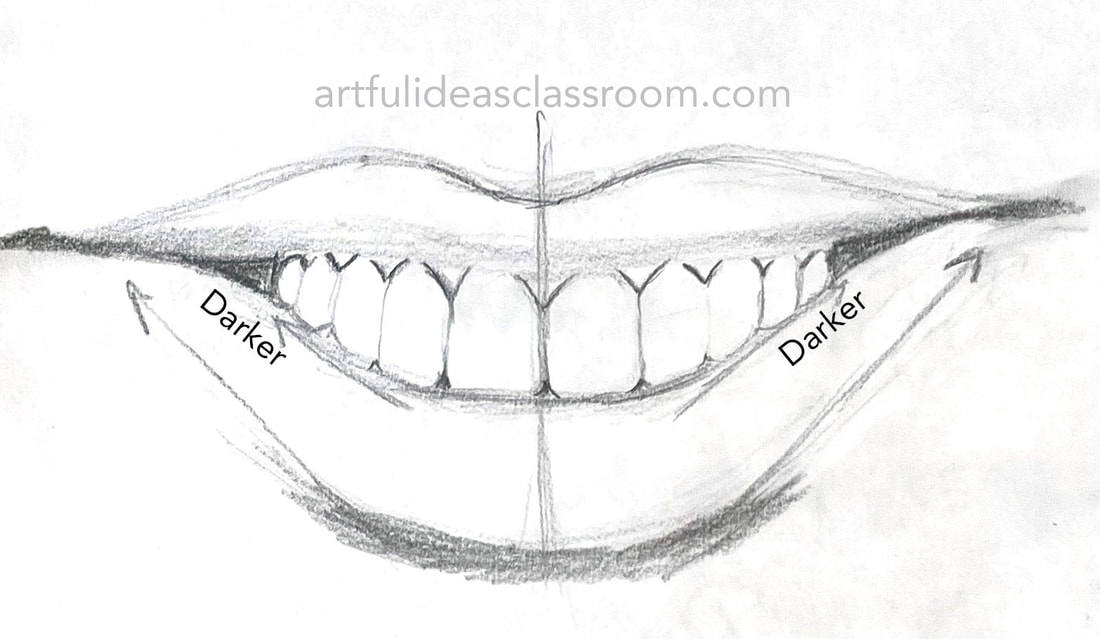
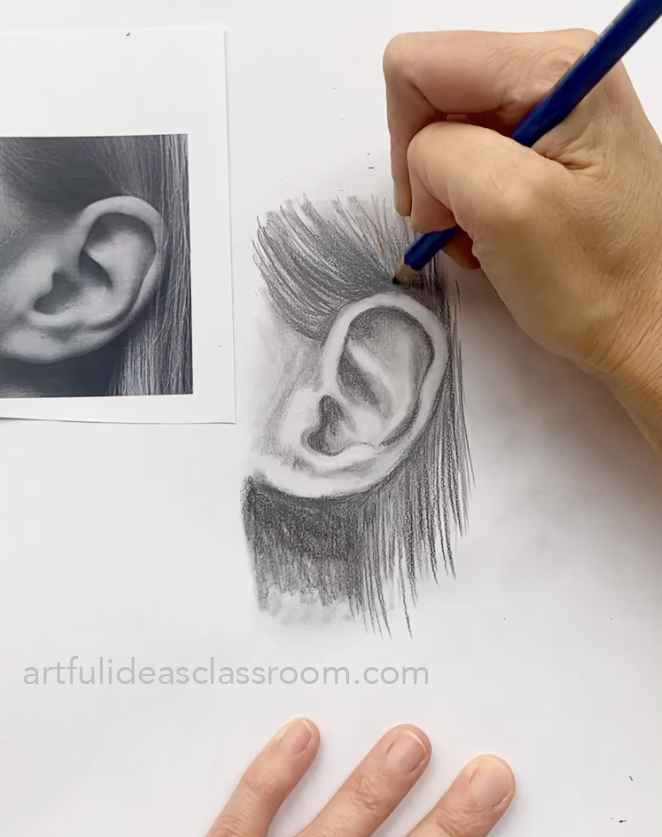
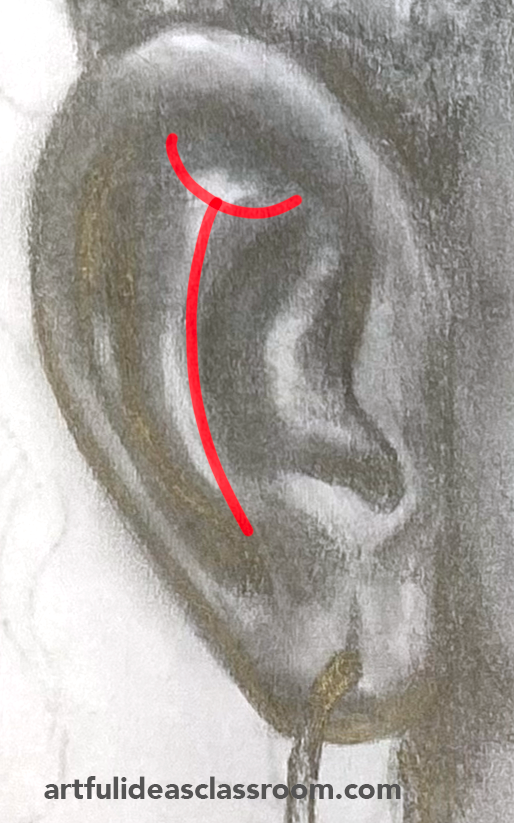
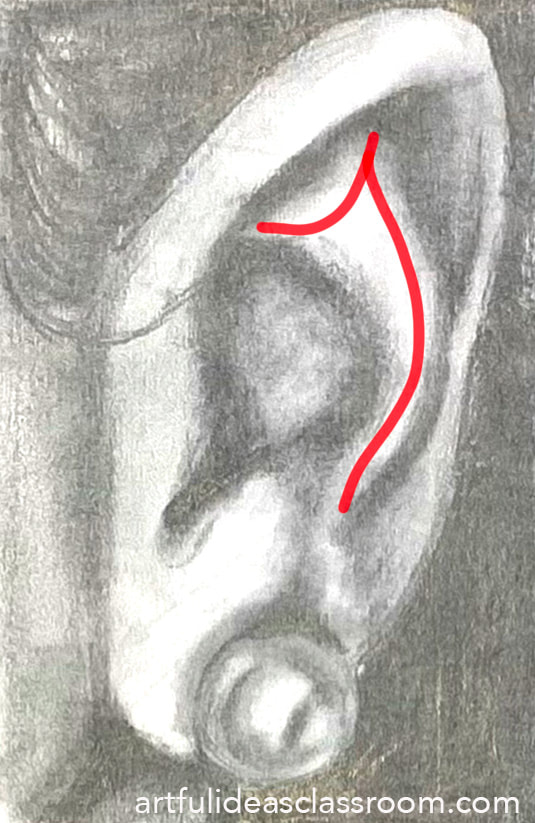
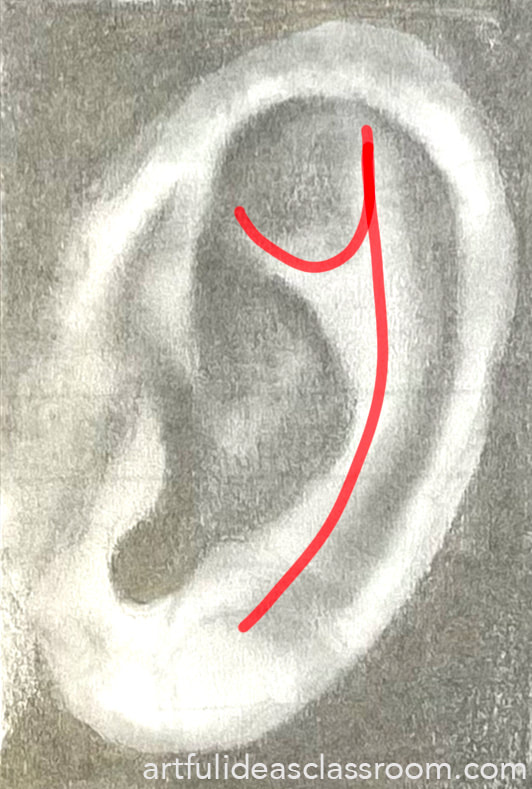
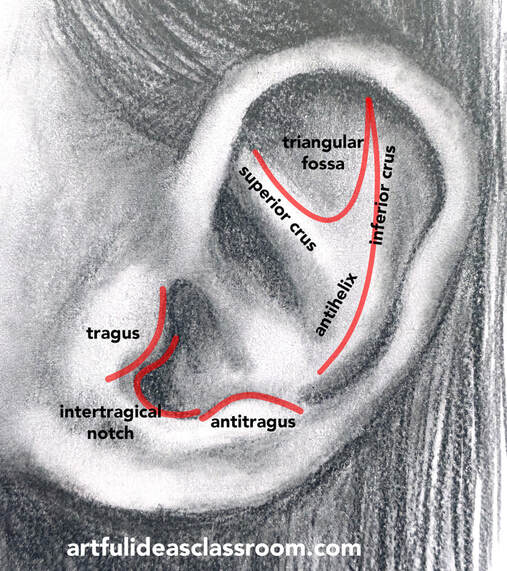
Drawing Tips for FacesGetting Started with Drawing the Features of the FaceI love to teach my students to draw the human face. It is a project where many students begin to build confidence in themselves as artists. It is so rewarding to see students having success and creating drawings that they are proud of and want to share with their family and friends. So how do we get to that point? The answer is a lot of skill building! Prior to beginning to teach how to draw the faces we do a pencil shading exploration and mini project. There are two different lessons I like to teach depending on the group and how much time I have. Both projects begin with students learning about drawing pencils and what the letters and numbers mean on the edge of the pencils. This is the drawing pencil set I purchase year after year, it comes with 144 pencils in an assortment of 2H, HB, B, 2B, 4B, and 6B. I find that students mostly use the 2B-6B for this lesson but the HB and B pencils are handy for sketching. The 2H pencils are a bit to hard for shading and tend to dent the paper so I pull them out of the set after the first day of exploration. To explore with the pencils we shade value scales for each of the pencils and do some practice shading by shading a sphere and gradients. Here is the value scales worksheet and the sphere and gradient practice worksheet that I use for this part of the lesson. I also provide students with kneaded erasers and tortillions/blending stumps. Once we establish these basic concepts and skills we move on to either this Fractured Values Lesson in which students create a drawing individually or this Shading Puzzle Lesson which is collaborative. This progression is so important because it provides students with a necessary baseline understanding of the foundational concepts of value, light, shadow and tone as well as the target skills/techniques for rendering the full range of values in a drawing. Getting Started with Drawing the Features of the FaceWhen teaching how to draw the features of the face I like to start with the eye because most students have some familiarity with drawing human eyes and students can see a change in their skill level immediately following the lesson. To begin the lesson I ask students to draw an eye in their sketchbooks as a warm up. I give them around 10 minutes to draw and they don't use a reference image. Then we look at a slideshow with some of the anatomy and concepts around drawing eyes. I drew information from Stan Prokopenko an artist who shares drawing content on Youtube via his channel Proko. I highly recommend this Proko video: How to Draw Eyes-Structure it has a lot of great visuals that are helpful when drawing a realistic eye. Some of the content is a bit too in depth for my beginning level students so I picked through and chose concepts that would be most helpful to drawing an eye from the front on position. Following the slideshow and discussion we move on to a full class demonstration or "draw together." I do the demonstration using a document camera and project the image on the large screen in my classroom. If you would like to see my process for this demonstration check out this Eye Drawing Tutorial video on my Artful Ideas Youtube channel. Some of the key concepts that I focus on when teaching students how to draw eyes are: the top and bottom lids are not symmetrical (no football shaped eyes), to make sure that we don't show the whole iris, some portion of it is usually covered by the lids unless the subject is very surprised, to remember to shade the sclera (white part of the eye) because the eye is actually a sphere although we only see a portion of it through the eyelids. This one step adds so much realism. It is also important to demonstrate to students how to shade the iris out from the center and out from the edge in irregular radial patterns. I guide my students to use a slightly harder pencil for the contour drawing (HB, B or 2B) and softer pencils for shading 4B and 6B. After the demonstration student use reference images to practice drawing eyes. I like to use this site Pexels to find a variety of models of different ages, ethnicities and facial expressions to get a good variety of drawing references. I formatted these worksheets that include a page showing the anatomy of the eye and step by step strategies for drawing the eye front on and from the side view as well as a page with reference images and a place for students to sketch. Drawing the Nose RealisticallyAfter focusing on eyes I like to move on to drawing noses realistically. Students usually have less experience with drawing the nose. I like to start the lesson the same way where I ask students to draw a nose the way they typically do in their sketchbooks. These nose drawings usually have less detail and shading than the eye drawings from the previous lesson. Then we follow a similar procedure as the eye lesson. We look at slides and discuss the anatomy of the nose, and look at some anatomical illustrations of the cartilage under the skin, I think this is very helpful because it establishes the concept that there are several forms within the nose and helps students begin with an idea of structure. We also look at visual examples of the planes of the nose and how it should be shaded to look 3D. Then I lead students through a step by step demonstration. I use the three circles technique to draw the nose from a front on perspective. Students follow along in their sketchbooks as we work from the contour drawing to the shading. All of the students see improvement in their drawings from the warm up drawing and most are very proud of the noses they drew. There are a few tips that really make a difference when drawing the nose. The first is to remember that under the tip of the nose is in shadow, that includes the undersides of the wing (ala) or cartilage around the nostril. The second is to make sure that you shade the top of the nostril darker because light is reflected off of the skin in the nostril/above the lip and this area is lighter. The third is to shade the crease where the wing (ala) meets the cheek this is often an area where the shadow is quite dark. Drawing the Closed MouthI typically start students off with drawing a closed mouth because drawing the teeth can be really challenging. Like with the other features I start off the lesson looking at a reference image of a closed mouth and discuss the anatomy. The little dent above the upper lip (philtrum) is important to mention because I find students often omit this structure from their drawings. I like to use a method where the students draw 5 shapes, three for the upper lip (two ovals for the sides and a circle in the center), and 2 shapes for the lower lip, (larger ovals that meet in the center). This method is helpful because it gets students out of the habit of drawing a dark outline around the lips, and it sets students up to have volume and dimension in their drawings. I emphasize to students that in typical lighting the upper lip is in shadow because it curves down. I like to show a sketch of the face in profile to explain the light and shadow areas of the mouth and chin. This helps students understand that in typical lighting they should shade the upper lip (especially in the corners), and underneath the upper lip to show that it is protruding out from the face. Drawing the open mouth poses more challenges for students and it is a great drawing challenge for students with more experience. For teaching how to draw the smiling mouth I like to show a number of reference images and discuss the similarities and differences asking students to notice details. How many of the teeth show? Do we see both upper and lower teeth? How much do we see of each of the teeth (front/side view)? Where are the darkest areas of the image? Where are the lightest? This visual analysis helps students understand the main concepts of drawing an open mouth and what to look for when analyzing their reference image or subject. Once students have analyzed the reference image and start drawing I tell them to start by figuring out the angles that rise from the sides of the lower lip up toward the corners of the mouth and also the angles from the edge of the front teeth up to the corners of the mouth. This will help establish some basic lines to work from. I also suggest that students create a light vertical line from between the front teeth to help keep the drawing symmetrical. Although most mouths/teeth are not perfectly symmetrical this will help them balance their drawing and prevent elements from drifting to one direction or another. Drawing the teeth is challenging mostly because it is hard to represent the foreshortening that happens as we see less of the teeth as they move back toward the corners of the mouth. Also the shape of the teeth is often challenging for students to draw correctly. I find that it helps to discuss the shape of the gum line which is almost like little triangles between the teeth and that same shape is mirrored at the base of the teeth but the size of the triangles are much smaller. Also it is important to explain how we see less of the tooth the closer it is to the corner of the mouth (far away) also these teeth will be shaded a bit darker and the corners of the mouth will be in shadow. Drawing the EarsDrawing ears is easier than it looks- I think students struggle with drawing ears realistically because they overthink the process because the forms within the ear look so complicated. We start the lesson by looking at some reference images of the ear from the side and front views. I point out the "Y" shape the superior crus, inferior crus , anti-helix and triangular fossa make. This "Y" shape can be seen in the front and side views of the ear. This shape looks different on different individuals and from various angles. I like to show several examples so students can recognize this structure easily. This structure is one of the most prominent parts of the ear and so students can look for this as an area that will be highlighted in the final drawing and know that there will be shadows around this structure. I also encourage students to look for other shapes that are recognizable in the ear that they can look for like the curve of the tragus and intertragical notch. After discussing the anatomy I lead students through a step by step drawing demonstration of both the side and front on views of the ears. I originally used this resource from Master SS on Deviant Art, but over time I made my own version that has a bit more detail in the shading. I find it is really rare for students to need to draw the ears from the back view but I do have a few photo/ drawing references for students to use on their own if they are interested in practicing this view. After leading students through the step by step demonstration, the ear is demystified as a set of recognizable forms and I see students being much more confident drawing the ear in their own portraits.
2 Comments
bondo
4/29/2024 10:16:47 am
bondo
Reply
Leave a Reply. |
AuthorI'm a high school/middle school art teacher with 16 years of experience. I'm here to help art teachers free up more time and space in their lives through lesson ideas and ready to go content rich, engaging curriculum. Categories
Syllabus Planning
Sketchbook Covers First Day of School Avoid Teacher Burnout Digital Self Portraits Surrealist Techniques Features of the Face Bilateral Mirror Activity Gees Bend Art Lesson Arts Assessment Favorite Fall Lessons Chicano Artists Art Materials Guide IB Process Portfolio What is Art? Pattern Design Figure Drawing |



 RSS Feed
