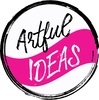
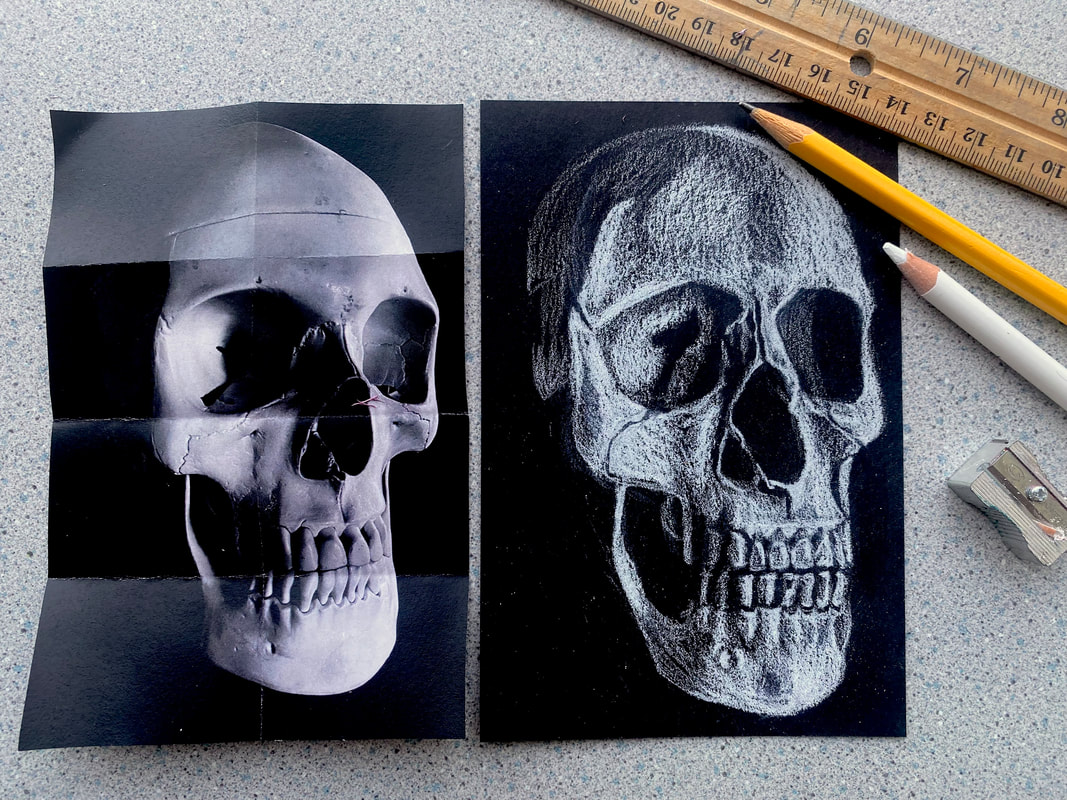
Fall Art IdeasThe days are getting shorter and the nights longer...the final harvests are coming in and the trees are becoming bare. In many cultures around the world the fall is a time to meditate on things that are temporal like the seasons and the fleeting nature of everyday life. This idea of the shifting balance of light and dark (as the days grow darker) always inspires me to turn toward mediums that highlight visual contrasts. This time of year also coincides with Hispanic Heritage Month so it is a great time to explore cultural traditions like Día de los Muertos in Mexico as well as the skeleton imagery of calaveras and La Catrina seen in the work of José Guadalupe Posada. During this time of late September through October I like to focus on two mediums in my classes: Pen and Ink and White Pencil on Black Paper. Pen and Ink Drawing for Beginners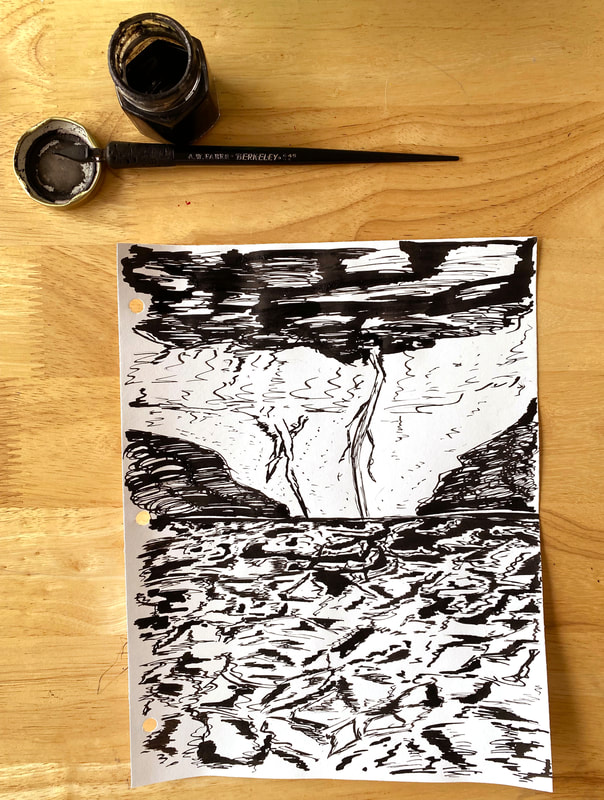 I absolutely love to teach a Pen and Ink Unit with several days of dip pen practice with my intro level students (Drawing and Painting 1 or Foundations Studio Art). I think this is the perfect medium for students early in the school year because it builds confidence with mark making. You cannot erase pen and ink and there is an uncontrollable element when working with liquid India ink. I like to keep the ink in small jars and fill caddies (I get mine from Dollar Tree) for each table with a jar for each student, an assortment of nib types in dip pen holders and paper towels. I start off the unit with exploring expressive line. We look at the landscape pen and ink drawings of Vincent Van Gough and the raw and expressive works of Ralph Steadman. We create our own expressive drawings as students explore the dip pens and the various nibs and the types of marks they can create. Students draw a storm or I have them choose an expressive word out of a bowl at random to inspire their drawings. Then we move on to learning pen and ink drawing techniques: hatching, cross hatching, stippling and scumbling. Students use a few different worksheets to practice these technique in value scales and on solid geometric forms. These techniques are so helpful for pen and ink beginners! I find that this practice not only helps students develop technical skills with the dip pen and mark making but it also gives students the vocabulary to describe what they are seeing in pen and ink artworks. I like to start class doing some discussion (Project Zero Thinking Routines) around artworks using this vocabulary. It is exciting to hear a student describe the intricate cross hatched lines of an artwork! The pen and ink drawings by artist Alphonso Dunn are always student favorites during this unit. Students then embark on their own individual projects applying what they learned in the lesson activities. 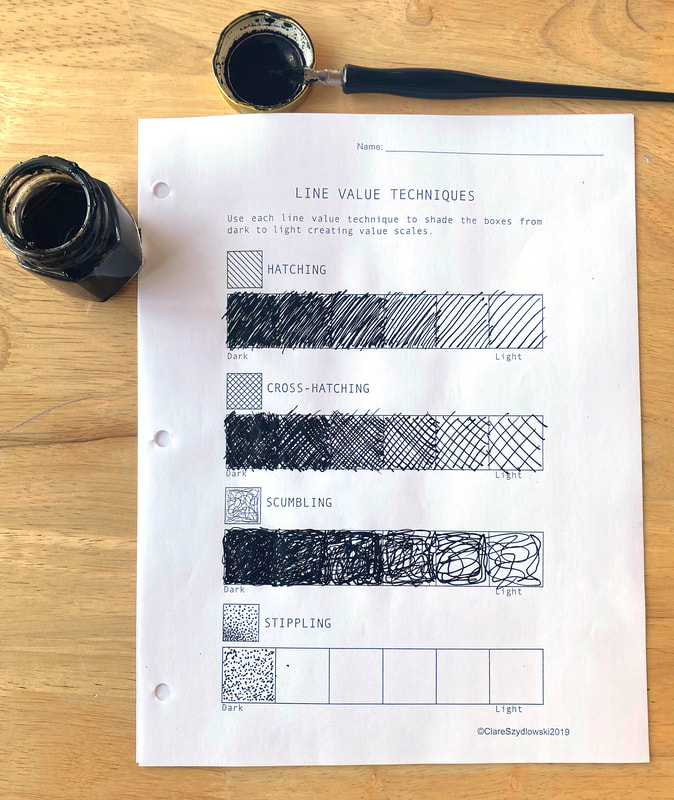  Black and White Still Life Drawing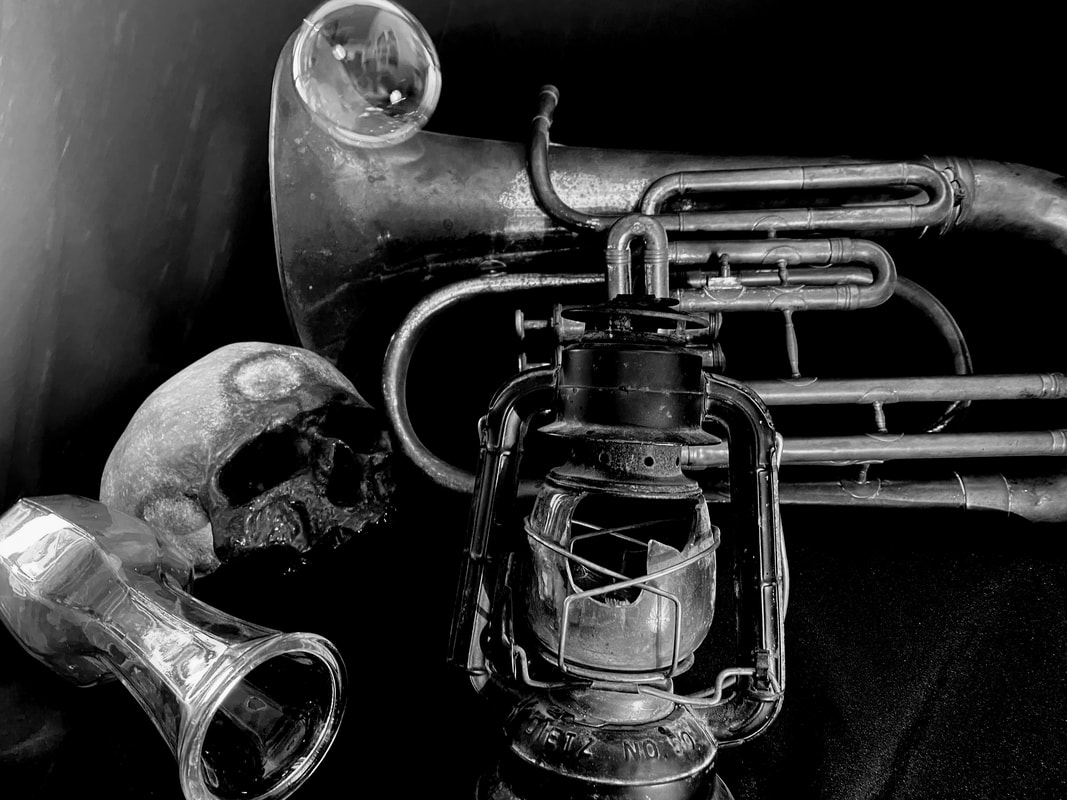 I have always loved Dutch Vanitas Still Life paintings. They often have a dark background that makes the objects in the paintings stand out in contrast. The history of the genre Vanitas is fascinating and the symbolic meanings behind the objects in these artworks offer the possibility for a rich discussion with students. The themes in these artworks center around the idea of "memento mori" or remember your mortality, in other words, all things are fleeting. These themes connect well to the Mexican Día de los Muertos tradition of Las Ofrendas, or altar that is set up with objects with symbolic meanings, as well as La Catrina a well dressed skeleton figure seen in the work of José Guadalupe Posada who reminds us that material wealth is fleeting and "we can't take it with us." Both of these cultural traditions relate to death in different ways and this is something you can explore in discussion with students or they can explore individually in their art journals. This lesson is rich in meaning and gives students an opportunity to explore the question "what is a still life in art?" and to contemplate how everyday objects can tell a story through symbolism. White Pencil on Black Drawing PaperFor this lesson students learn how to draw the lightest values of their reference image which is opposite to how they typically draw (adding dark to white paper). This can be really challenging for students. I like to use Prismacolor Premier Soft Core Colored Pencils on Canson XL Black Drawing Paper for this lesson it gives a really bold white and erases fairly easily. I begin the lesson by teaching students how to create two value scales: one that is 5 steps and one that is a gradient. I typically give students two pieces of 4" X 6" paper one to make the two value scales and one for the white pencil on black paper drawing study. For the study students choose from a group of reference images (I include glass objects and skulls that I photographed and edited to be high contrast). Students use a simple gridding system and graphite pencil to sketch the proportions of the object and then match the values in the reference photo as best as they can using the white pencil. Students will wear down the pencils as they draw so having a handheld sharpener is very helpful, I use these Handheld Metal Pencil Sharpeners.
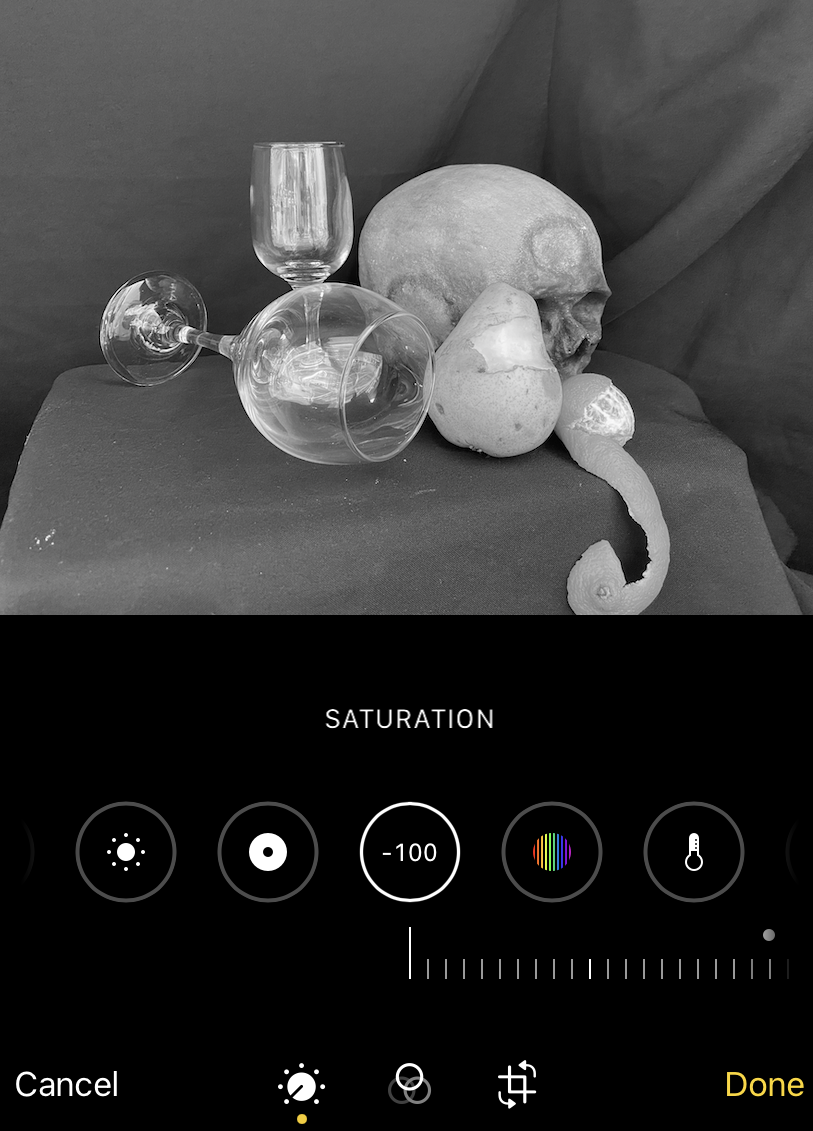
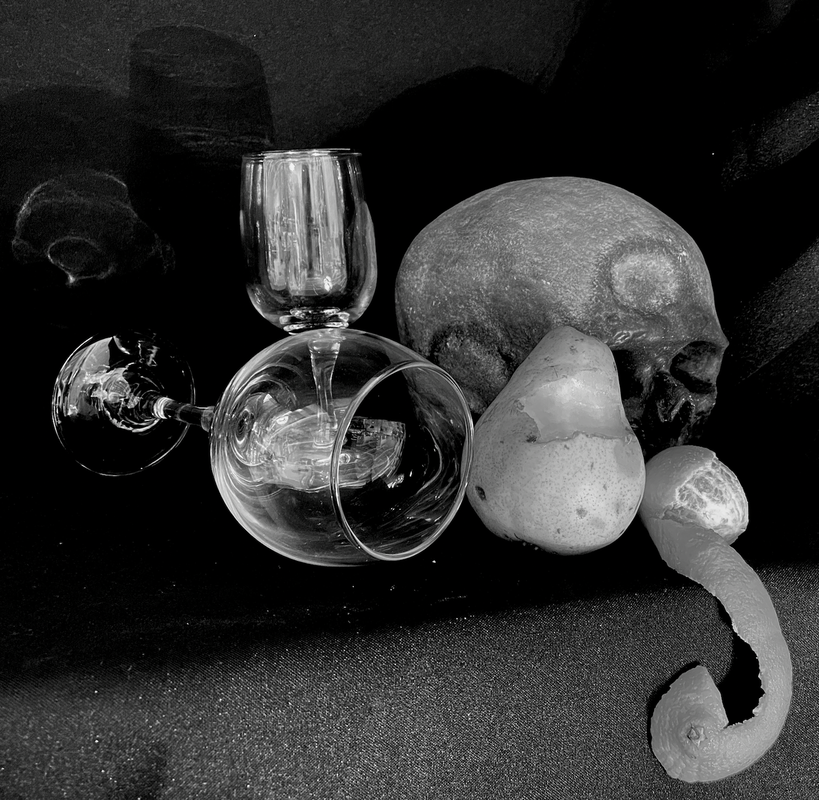
Tips for Still Life PhotographyAfter completing the study students create their own still life and photograph it to use as a reference photo. I create a couple of areas in the classroom where students can set up and photograph the still life. I use black cloth as a background and various size boxes to create risers for objects so they can sit at different heights. I also supply a variety of objects: glassware, replica skulls (I borrow from the anatomy teacher) and any other objects I have laying around that might be good to use. It is also fun to include bubbles so we often have a bubble machine or students blow bubbles for one another while they photograph. But I do encourage my students to bring in their own still life objects that have symbolic meaning for them. The photographs need to be edited to be very high contrast so that they can be drawn with white pencil on black paper. 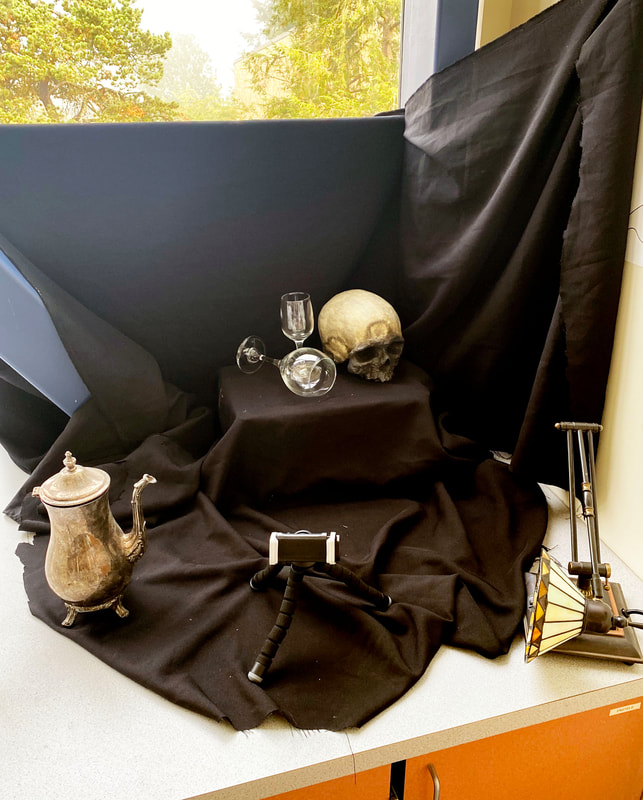 Here is a photo of how I set up the still life photography area, it is also helpful to have a single light source to create highlights and shadows. My classroom has big windows with no shades (hey I'm not complaining!) but it does make it challenging for photographing still lives.
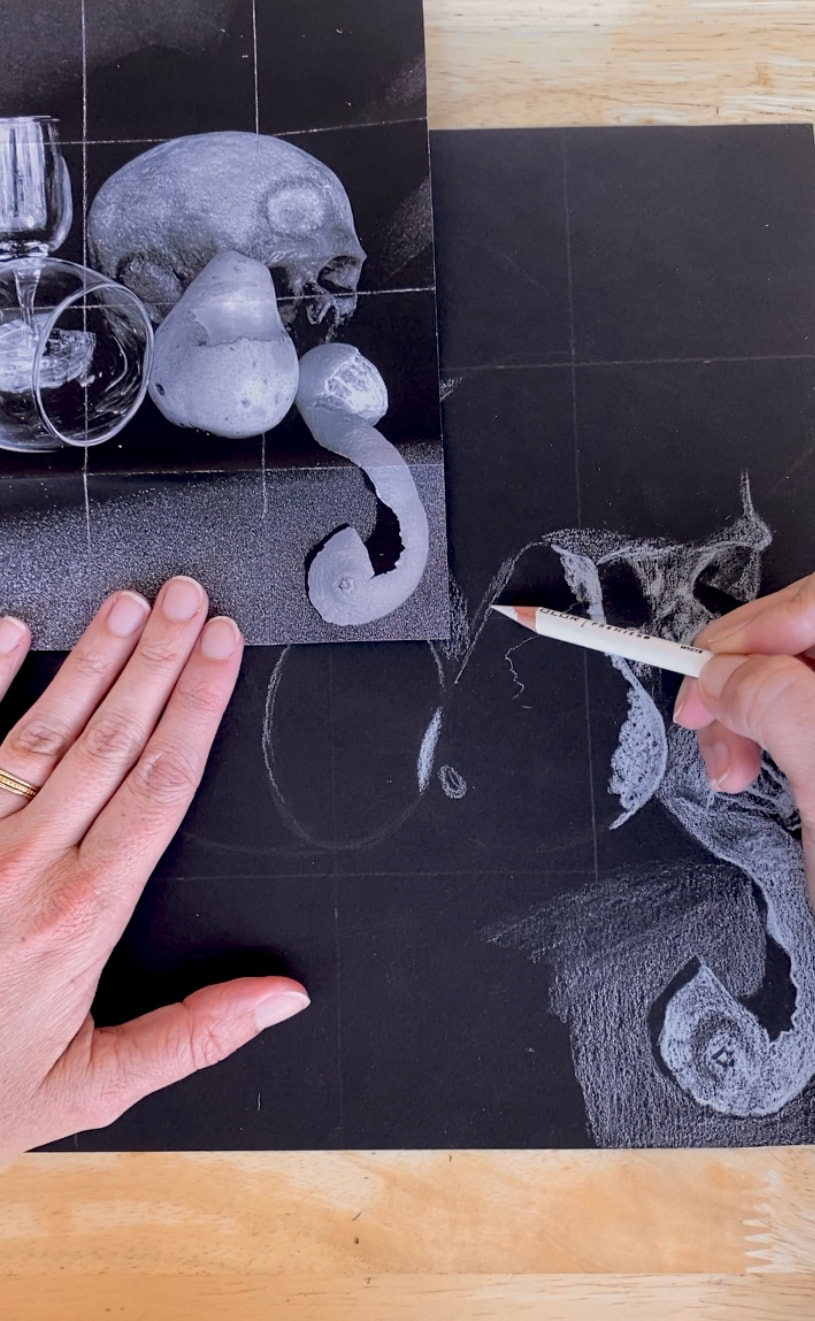 Still Life Drawing TipsI teach my students how to grid their reference image and paper. We do a bit of art math figuring out the proportions of their reference image and cut paper to match those proportions. I have also in previous years made the sizes standard 7.5"/10" reference image on 9"X 12" paper. I tell my students to sketch with graphite before drawing with white colored pencil. These drawings are intricate but I find once students get started they work quite quickly and it usually takes around two 75 min class periods to complete. 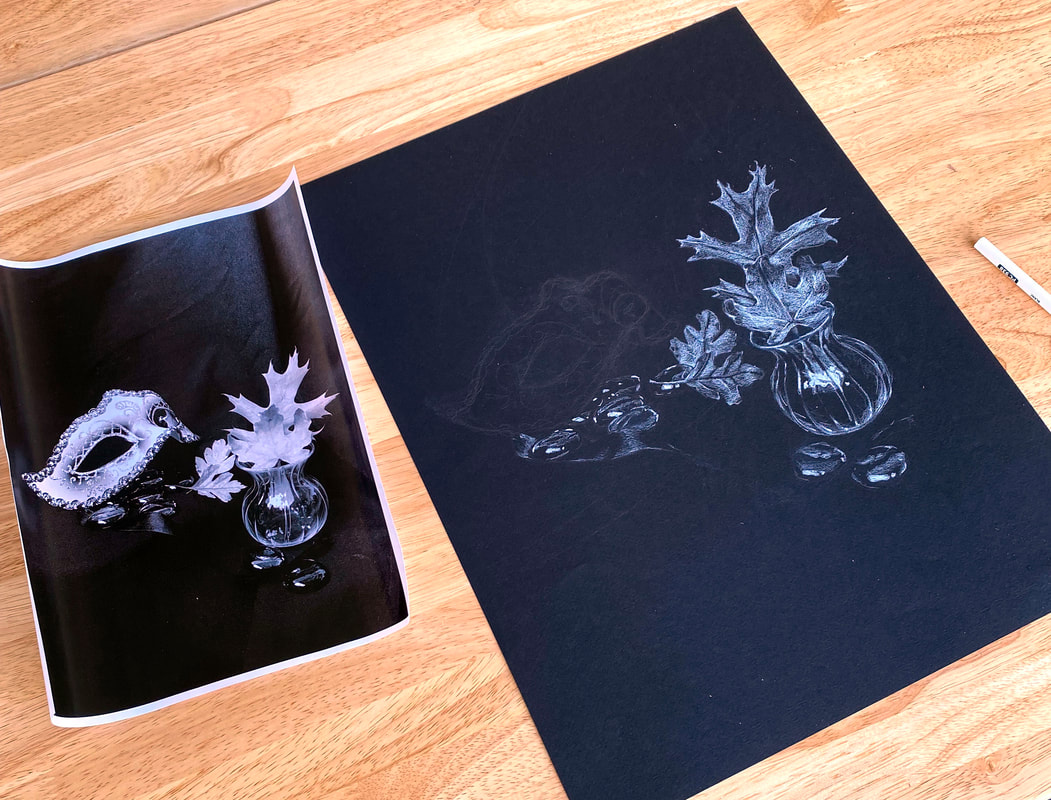 Above: here's an example of a student drawing in progress. 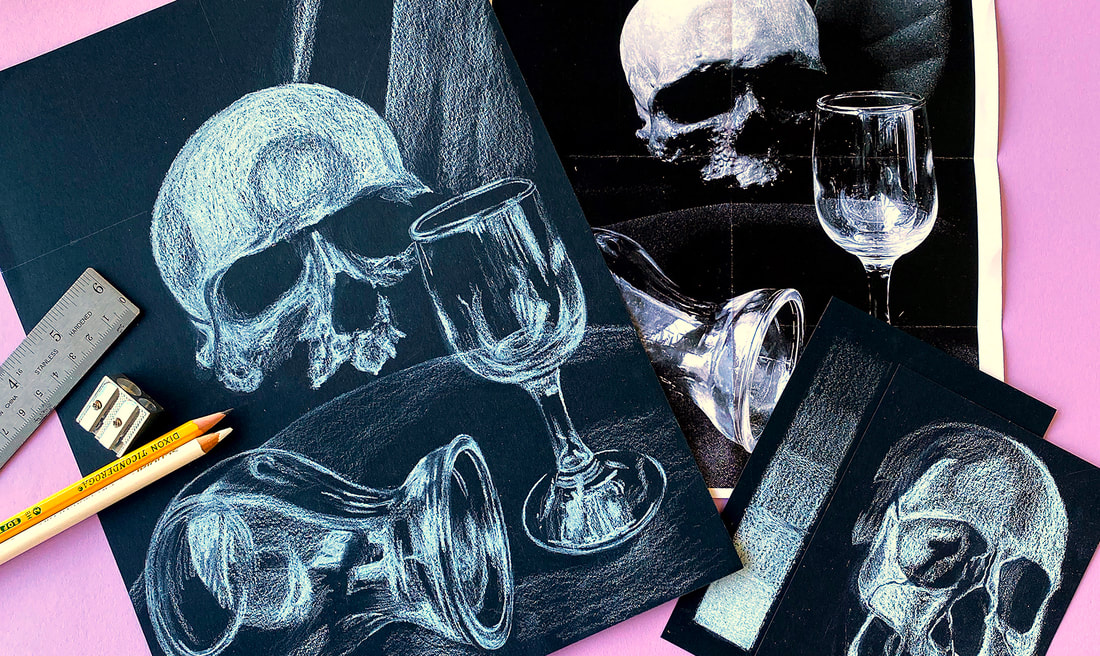 If you're interested in purchasing the full lesson plan with materials list, printable and perfectly sized reference images, slideshow, and extension Art Journal prompts and research activities click here. If you try either of these lessons with your students tag me over on Instagram!
0 Comments
Leave a Reply. |

AuthorI'm a high school/middle school art teacher with 16 years of experience. I'm here to help art teachers free up more time and space in their lives through lesson ideas and ready to go content rich, engaging curriculum. Categories
Syllabus Planning
Sketchbook Covers First Day of School Avoid Teacher Burnout Digital Self Portraits Surrealist Techniques Features of the Face Bilateral Mirror Activity Gees Bend Art Lesson Arts Assessment Favorite Fall Lessons Chicano Artists Art Materials Guide IB Process Portfolio What is Art? Pattern Design Figure Drawing |

 RSS Feed
