
Art for Hispanic Heritage MonthI have long admired the work of Mexican printmaker and political cartoonist José Guadalupe Posada (b.1852 – d.1913). Printmaking is often referred to as the “democratic art form” because the production of multiples makes printed art more widely available, but also because in Posada’s time the populace was largely illiterate and relied on imagery to inform them of current events, and political issues. Posada’s work was especially impactful because of his use of symbols that conveyed meanings easily recognized by his audience. The most iconic of these are the calaveras or skeletal figures that are so prominent in his work. These calaveras have ties to ancient Aztec culture as well as the important holiday in Mexico, Día de los Muertos where families honor their departed ancestors and the natural cycles of life and death are celebrated. Calaveras can be used in art to convey a variety of messages, and are a intriguing topic to explore with Middle School and High School art students and a great way to learn more about Día de los Muertos artists and printmaking in art.  Bringing Calaveras to the ClassroomI wanted to design a culturally rich lesson, letting students use symbols akin to Posada's illustrations to convey messages relevant to their lives. Calaveras, or skeleton/skull symbols, have deep roots in Mexican culture and art, tracing back to the Aztec empire. Teaching this history is an important step so that student understand how symbols evolve and how artists can reshape them to create new meanings. To set up this lesson it is also important to convey the complex web of meanings surrounding calaveras. Since José Guadalupe Posada’s work is our guiding inspiration, I chose to use his work as a starting place. José Guadalupe Posada is considered the father of Mexican printmaking. He popularized calaveras in his Hojas Volantes (translated as “flying sheets”) or broadsheet illustrations. The idea behind using skeleton figures is to strip down all the trappings of a person (their wealth, status, social rank) and to show that we are all equal in our mortality. 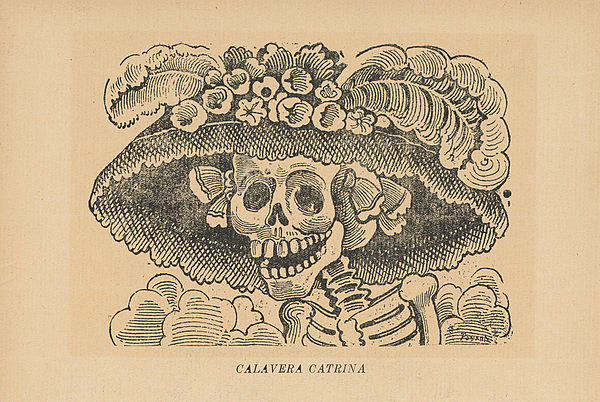 Calavera de la Catrina (Skull of the Female Dandy), from the portfolio 36 Grabados: José Guadalupe Posada, published by Arsacio Vanegas, Mexico City, c. 1910, zinc etching, 34.5 x 23 cm. La Calavera CatrinaThe most famous of Posada’s calaveras is La Calavera Catrina, or the elegant lady skeleton. Posada created La Catrina to criticize the Mexican elites of his time, specifically in their European manner of dress and customs and their scorn of the indigenous roots of the country. Today La Catrina has become a symbol of Día de los Muertos, a holiday that honors the lives of departed family members and ancestors. In Mexico, La Catrina can be seen on ofrendas or altars, in parade floats and as a popular costume for revelers in Día de los Muertos festivities. La Catrina also appears in one of Diego Rivera’s murals, “The Dream of a Sunday Afternoon in Alameda Park.” She appears in the center of the mural holding the hand of a young boy who is the young Diego Rivera. La Catrina even appears in the 2017 Disney film, Coco about a young boy who after a series of events is transported into the afterlife on Día de los Muertos. Calaveras de azúcar, or sugar skulls are another example of skull imagery associated with Día de los Muertos. These small intricately decorated confections harken back to the skull designs seen in ancient Aztec art. Aztecs held a yearly celebration to honor ancestors and the goddess of death/rebirth Mictecacihuatl who the Aztecs believed guided souls into the underworld. Día de los Muertos as a tradition represents the melding of Aztec and Spanish Catholic beliefs.  Girl in Catrina makeup and costume neighborhood of Coyoacán. The Art of Día de los MuertosCalaveras serve as joyful symbols of the cycle of life and death, embodying the idea that death is an integral part of the human experience to be embraced rather than feared. During Dia de los Muertos, celebrated November 1st and 2nd, families create ofrendas (altars) adorned with images of calaveras and other offerings to honor and remember deceased loved ones. Calaveras are meant to evoke a sense of playfulness and are often depicted dancing or playing music. Students can draw inspiration from a wide variety of calaveras imagery for this lesson and incorporate traditional symbols of Día de los Muertos like candles, marigold flowers, butterflies and a special bread roll called pan de muerto. Students can also incorporate symbols from their own lives or interests into the design. For example in the photo below, where the calavera has symbols of weath and social media fame. This concept is criticizing the cultural focus on accumulating views, likes and money instead of family and relationships. 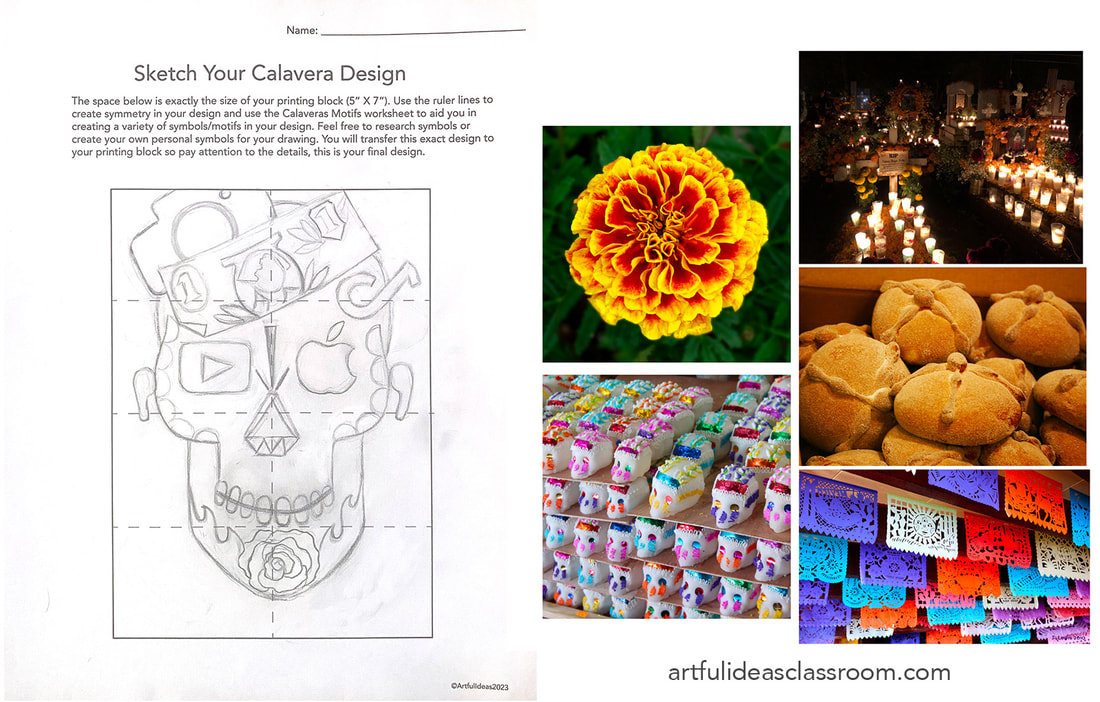 Students should spend some time researching symbols and sketching out ideas in their sketchbooks before drafting their final designs. Every symbol carries specific meanings so it is important students consider the message of their piece and the ideas they want to convey. It is also fine for students to include decorative elements that are more abstract and connect with the decorations seen on calaveras de azúcar and have mix of meaningful and decorative motifs in their design. 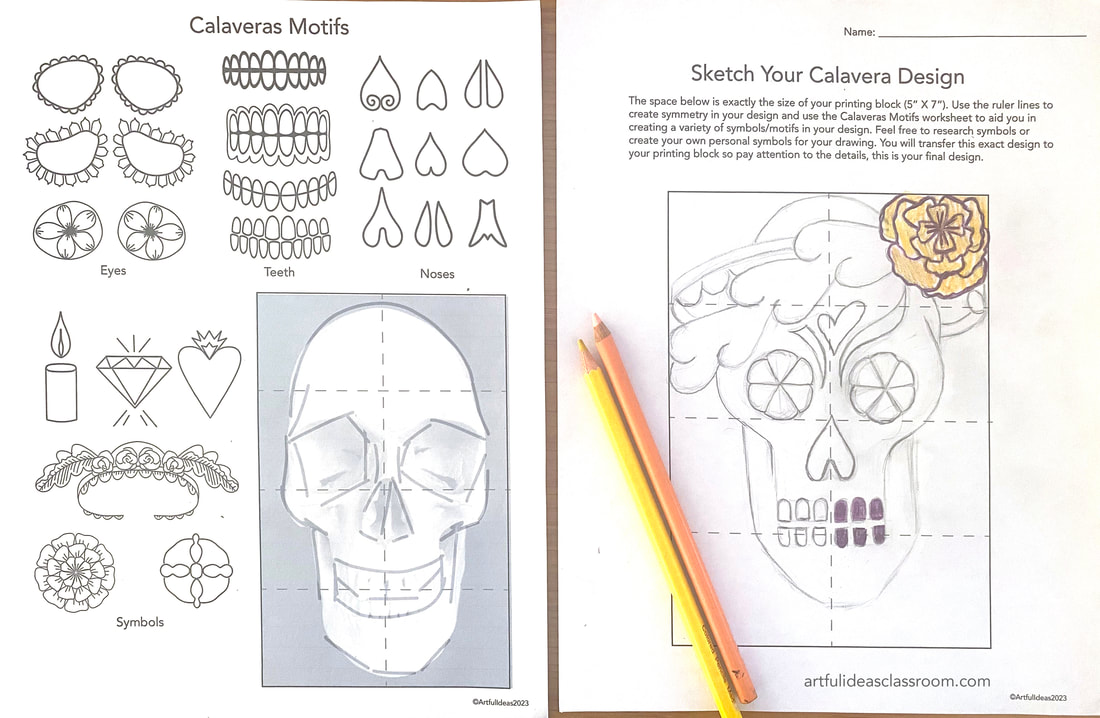 I present the idea of “stylizing” imagery or breaking it down into simple shapes and lines, this works well with relief printing and makes for a more successful design than drawings that are highly detailed with shading and subtle value shifts. Students should begin thinking in terms of layers and considering what will be “flats” or filled areas and what will be “line-work” or outlines. I created a worksheet and image reference guide to help students stylize their calavera designs and plan out the composition. All of the planning should happen on paper because you can only transfer the design to the block one time. Designs do not have to be symmetrical but the skull imagery lends itself to balanced designs. Sketching a Block Print Design Reduction Block PrintingReductive printmaking, where a single block is carved multiple times to create a multi-colored print is a challenging form of relief printing but it is also visually impressive and teaches students valuable lessons of being decisive in their work (since you cannot go backwards in the process), and the importance of composition planning. The process requires careful planning and precise execution. Here's a brief overview of the reduction printing process along with some tips for success:
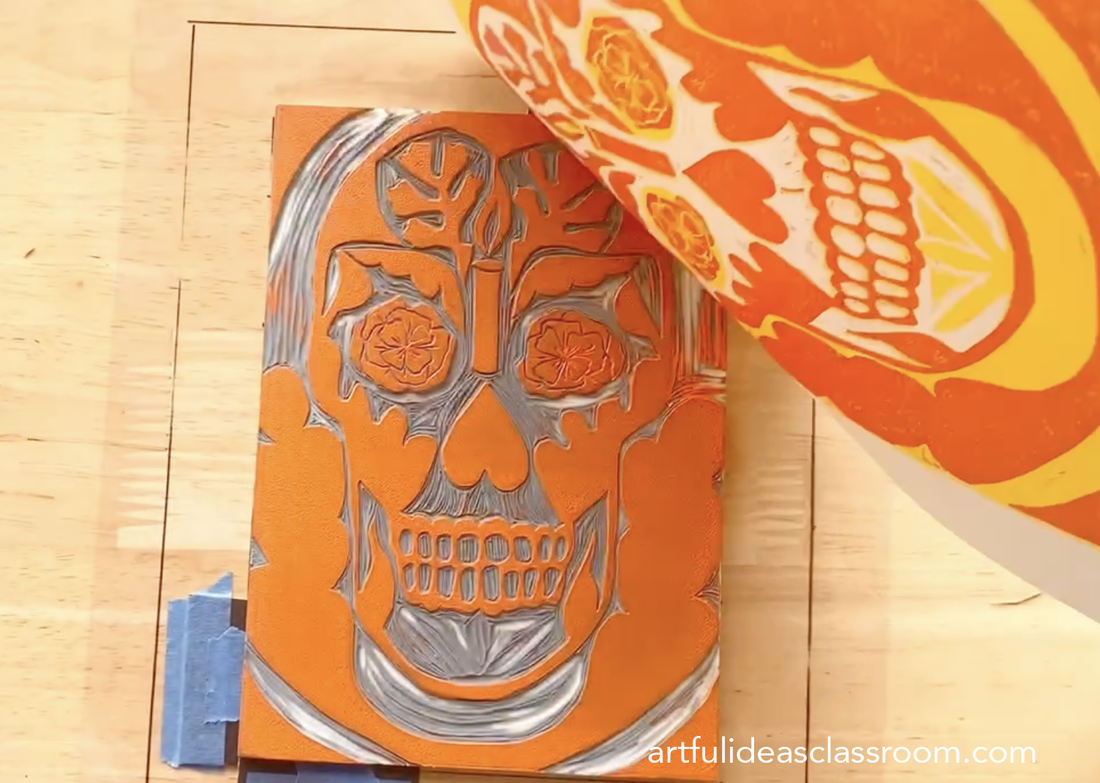
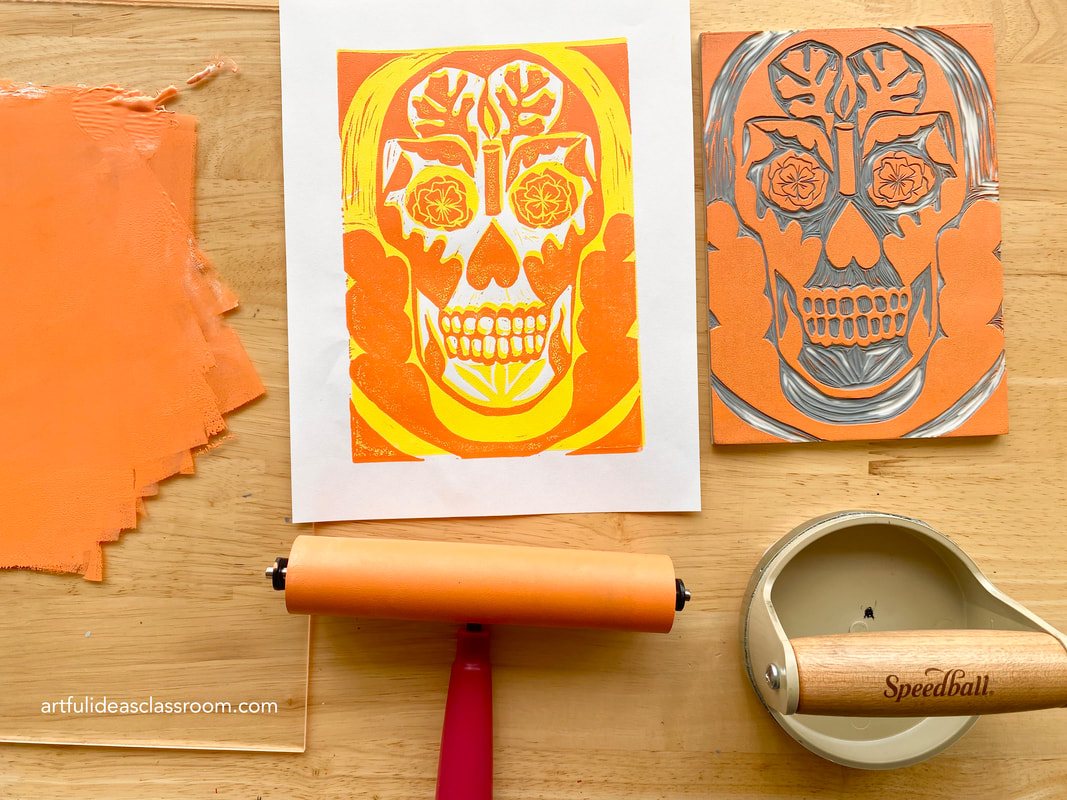 Reduction Printmaking Tips
 Registration jig made with transparency and cut mat board Connecting to Contemporary ArtI was first introduced to the power of the Mexican printmaking tradition while a student at Mission Gráfica printmaking studio in San Francisco, California. There I had the opportunity to study under renowned Chicano (Mexican-American) printmakers Juan Fuentes and Calixto Robles. The most amazing part of that studio is that like printmaking itself, it is a space accessible to the general public. The classes are on a drop in basis and affordable and the teachers are masters of their craft. If you are interested in visiting Mission Gráfica, it is located in the Mission Cultural Center for Latino Arts in the Mission District of San Francisco. Both Fuentes and Robles employ calaveras in their work and draw from a long lineage of Mexican printmaking traditions from both Mexico and the United States. Including the work of these contemporary artists brings the lesson into the present day and helps students understand how symbols can be reinvented and repurposed to approach contemporary issues in artwork. Both Fuentes and Robles create artworks that address current events and social/environmental issues in their work, much in the tradition of Posada. 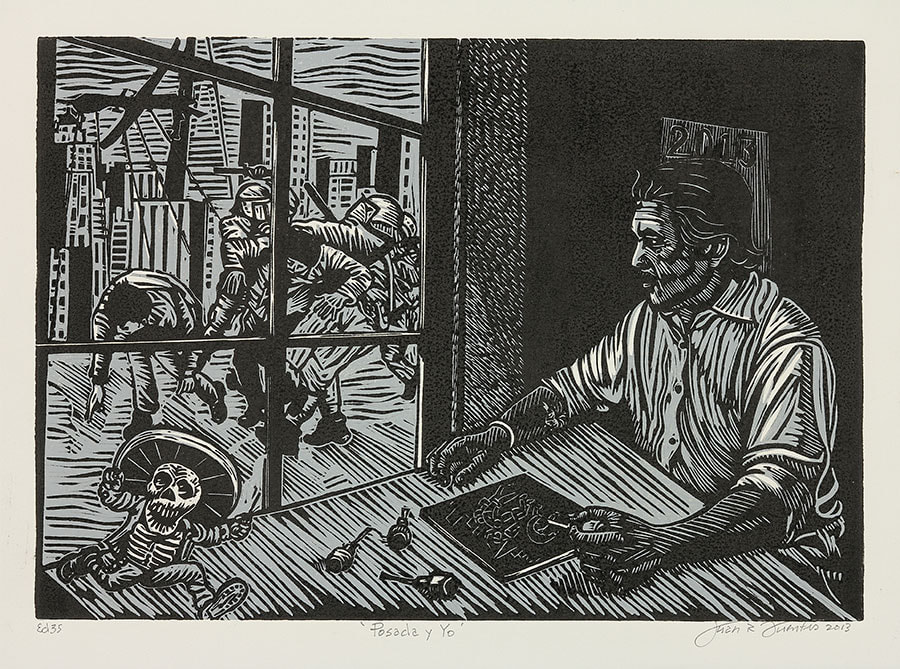 Juan Fuentes, Posada y Yo, linocut 2013, 12” X10” Get Students Thinking About ArtThis lesson, while challenging teaches students about the robust history of Mexican printmaking and the artists who continue that legacy today. Students also learn important studio habits of mind Engage and Persist as they work through a complex process. As the closing part of this lesson students write a reflection about their artistic choices and the meanings their calavera design conveys. They can also do a print exchange with their classmates and take home a variety of images since each student will print an edition of 7-10 prints. The final prints are vibrant and visually complex. If you are interested in the full lesson plan with slideshow and step by step instructional videos it is available on my TPT shop. *some links are affiliate links, as an Amazon Associate I earn a small commission on qualifying purchases. 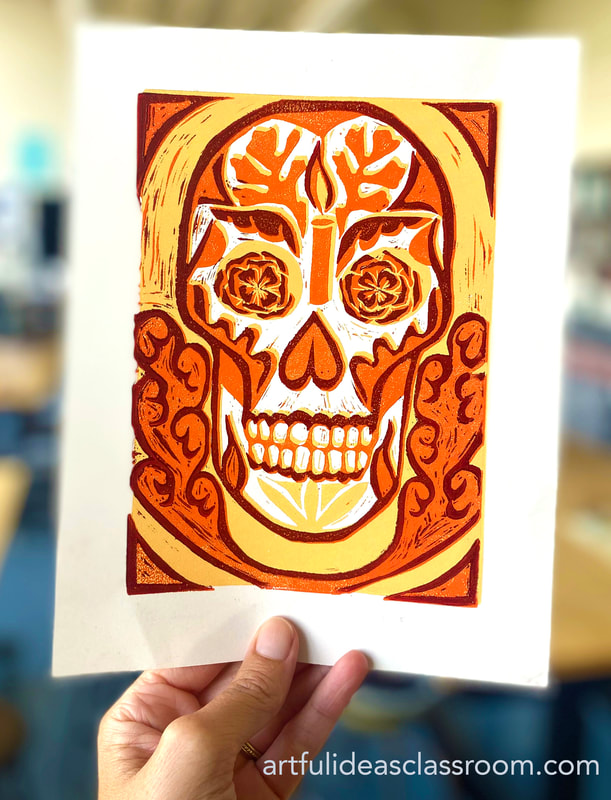
0 Comments
Leave a Reply. |
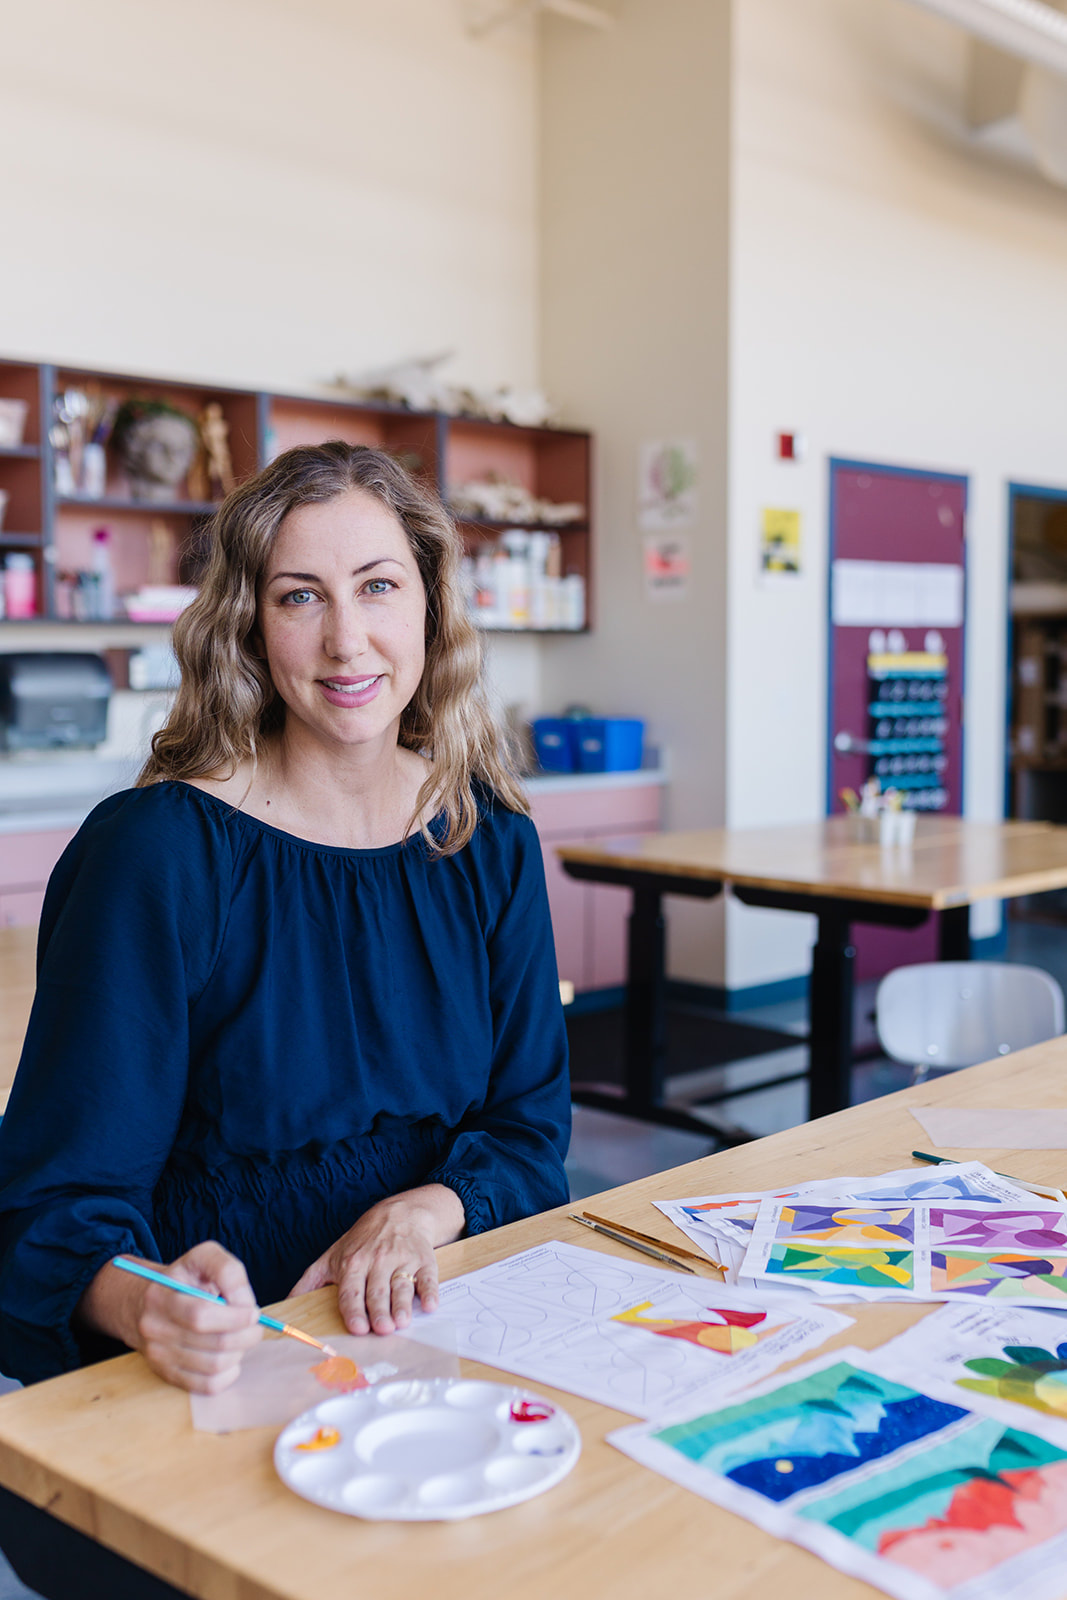
AuthorI'm a high school/middle school art teacher with 16 years of experience. I'm here to help art teachers free up more time and space in their lives through lesson ideas and ready to go content rich, engaging curriculum. Categories
Syllabus Planning
Sketchbook Covers First Day of School Avoid Teacher Burnout Digital Self Portraits Surrealist Techniques Features of the Face Bilateral Mirror Activity Gees Bend Art Lesson Arts Assessment Favorite Fall Lessons Chicano Artists Art Materials Guide IB Process Portfolio What is Art? Pattern Design Figure Drawing |
 RSS Feed
